Synopsis: As vice president of practices for BOWA in McLean, Va., Doug Horgan has seen his fair share of mistakes when it comes to electric in-floor heating in bathrooms and he’s seen further mistakes occur when somebody comes in to try and fix the problem. Horgan walks through installation issues his team has stumbled upon, how to avoid them, and what you should know when tackling in-floor heating projects.
The design-build firm I work for does renovation work in Washington, D.C., and some of the surrounding suburbs. As vice president of best practices, it’s part of my job to investigate when things go wrong on our projects and to prevent those same problems from
happening again. Electric in-floor heat is specified for a lot of our projects’ bathrooms; unfortunately, I’ve seen a number of failures, both on our own jobs and on others where we’ve been called in to fix existing problems. Clients are very unhappy when the expensive floor they were expecting to be toasty warm is not. What’s worse is that the fix is generally difficult and expensive. I hope that by sharing what we’ve learned over the years, you can avoid the same headaches.
For starters—and this may sound obvious—you have to read the installation manual for the specific heating product you’re using. We’ve had occasions when electricians and tilesetters installed things incorrectly. The general contractor or project manager should check in with subcontractors during their parts of the job to make sure the work is being done according to the manufacturer’s instructions. What follows are some things your lead can do to improve your chance of success with in-floor electric heat.
Get the wiring right

|
Problem We’ve installed wires wrong and forgotten temperature sensors; we’ve put the sensors in the wrong places and under likely spots for rugs and bath mats. We’ve also failed to install a contactor—an electric switch needed for larger floors. |
Solution
Our project managers now make sure our electricians and tile installers are familiar with all the installation requirements, and they make regular checks to ensure the work is executed to plan. We also check with the tile and electrical contractors to ensure we’ve ordered everything for a successful installation. |
Heat where there are feet

| Problem
We’ve missed parts of the walking surface—such as toekicks—next to bathtubs, at makeup stations, and at other areas where feet are under cabinets. When people pay for heated floors, they really don’t like cold areas where they stand or rest their feet. |
Solution
We now mark the exact fixture and cabinet layout to
|
Watch wet areas

| Problem
Wet areas have additional requirements to protect bathers. You can’t guess at important installation details like whether the heating wire goes on top or under the waterproofing or whether you run the wire over or through the curb. |
Solution
Don’t guess. Check instructions for the wire kit you’re using, and call, text, or email tech support if you have questions about anything that varies from the site conditions described in the basic instructions. |
Mind the gaps
 |
 |
| Problem
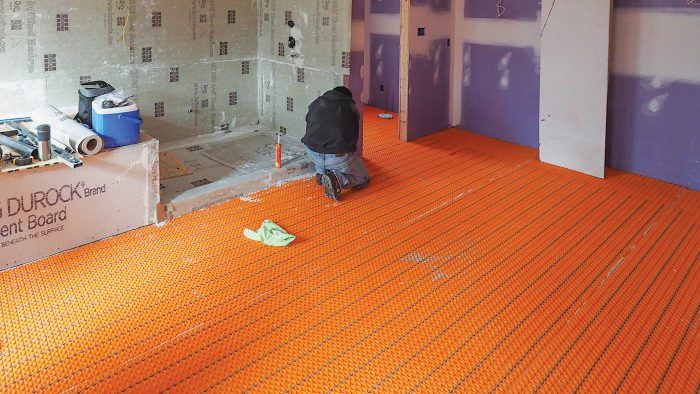
We have used presized heating mats (instead of loose wire) and have not placed them close enough together, resulting in sections of cold floor between them. We’ve also had to fix a floor with hot spots where someone put mats too close together. |
Solution
We now draw out the full-scale layout on the floor and only use heating wire that we route ourselves around the bath. We save the layout drawings and take pictures of the installation when the wiring is finished. |
Avoid swapping tile

| Problem
The clients objected to the color of two limestone tiles in this floor, and we cut them out to replace them and damaged two adjacent tiles when making the swap. We also cut the heating wire in 11 places, voiding the warranty. The floor failed a year after being repaired. |
Solution Avoid changing tiles if at all possible. It almost always damages the wires. Repair kits are available, but they void the warranty, and we have had further failures even with careful repairs. |
Locate wires before drilling
 |
 |
| Problem
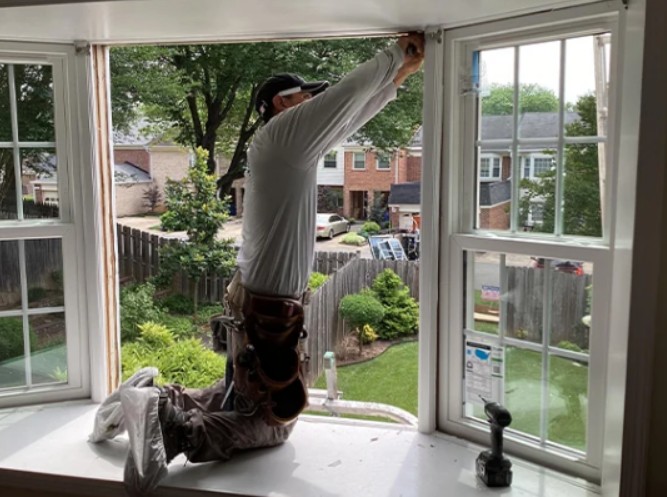
We’ve damaged the heating wire with fasteners for shower glass. In this case, the specialist in the photo charged us $700 to use a high-voltage generator to make arcing that was easier to see with his infrared camera. |
Solution
If holes are needed in a heated floor, we use our infrared camera to mark the exact location of the heating wires on blue tape to avoid them. |
Steer clear of cabinets and fixtures

| Problem
We haven’t had these particular problems, but we’ve heard of contractors tucking excess wire under a vanity or tub, which can cause potentially dangerous overheating, or running the wire too close to a closet flange and melting the wax ring. |
Solution
A full-scale layout drawn on the plastic mat that holds the heating wire solves these problems. Don’t run the heating wire under cabinets or bathtubs, and maintain the manufacturer-required clearances to fixtures. Maintain clearances to heat sources like ducts, radiators, and pipes. |
Protect the wire during setting
 |
 |
|
Problem Sometimes trowels nick the wires when the tile is being set on top of the heating system. It’s very hard to track down the damage once the floor is finished. |
Solution
Manufacturers of heating systems offer continuity alarms that sound when a wire is cut. We have our tile subcontractor provide and use one of these alarms. It’s in place through glass installation. |
Know the resistance

| Problem
The heating wire has a specified resistance rating measured in ohms that you’ll find on a label attached to the end. If you pull off the label it’s much tougher to determine what the resistance should be for testing. |
Solution
We have electricians leave the label on the wire, or at least put it in the junction box. We can test that cable at any point during construction to confirm it’s intact. Other important information for recalls or repairs is also on that label. |
Say it loud
 |
|

| Problem
Anyone drilling in or near a heated tile floor can damage it; they may have no idea that the floor is heated, and they could drill through a heating cable and ruin it. |
Solution
One of the easiest ways to prevent problems is to alert workers and subcontractors that there are embedded wires in the floor. Hang signs and tell shower-glass subs, plumbers, and anyone else who may be drilling the floor that you’ll need to mark the wires using an IR camera before any drilling can occur. |
Doug Horgan is vice president of best practices for BOWA in McLean, Va. Photos by the author.
From Fine Homebuilding #308
RELATED STORIES